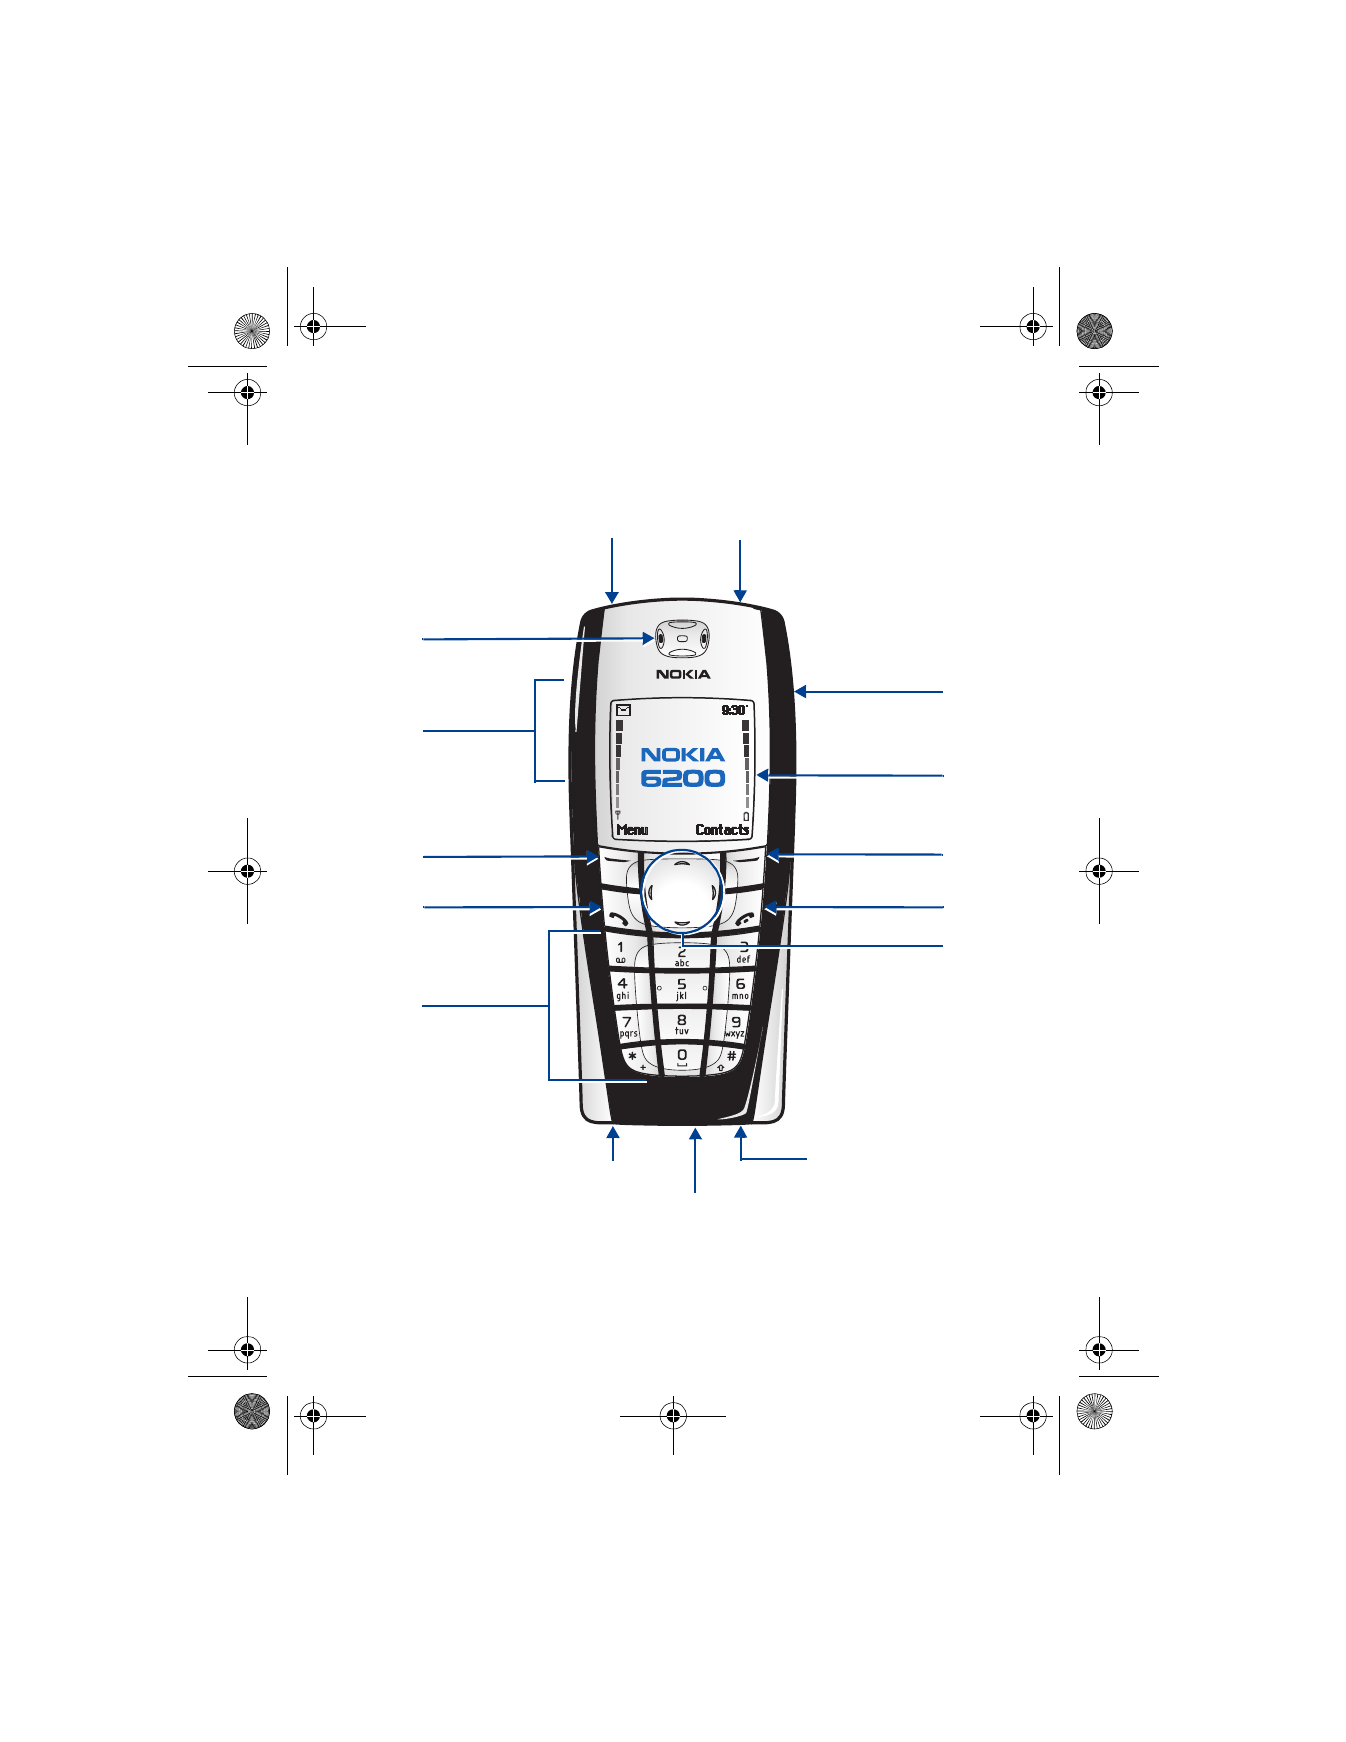
Microphone
Pop-Port
TM
connector
Charger jack
4-way scroll keys
+
-
Handsfree
speaker
6200.ENv1_9356027.book Page 7 Wednesday, July 7, 2004 3:40 PM
[ 8 ]
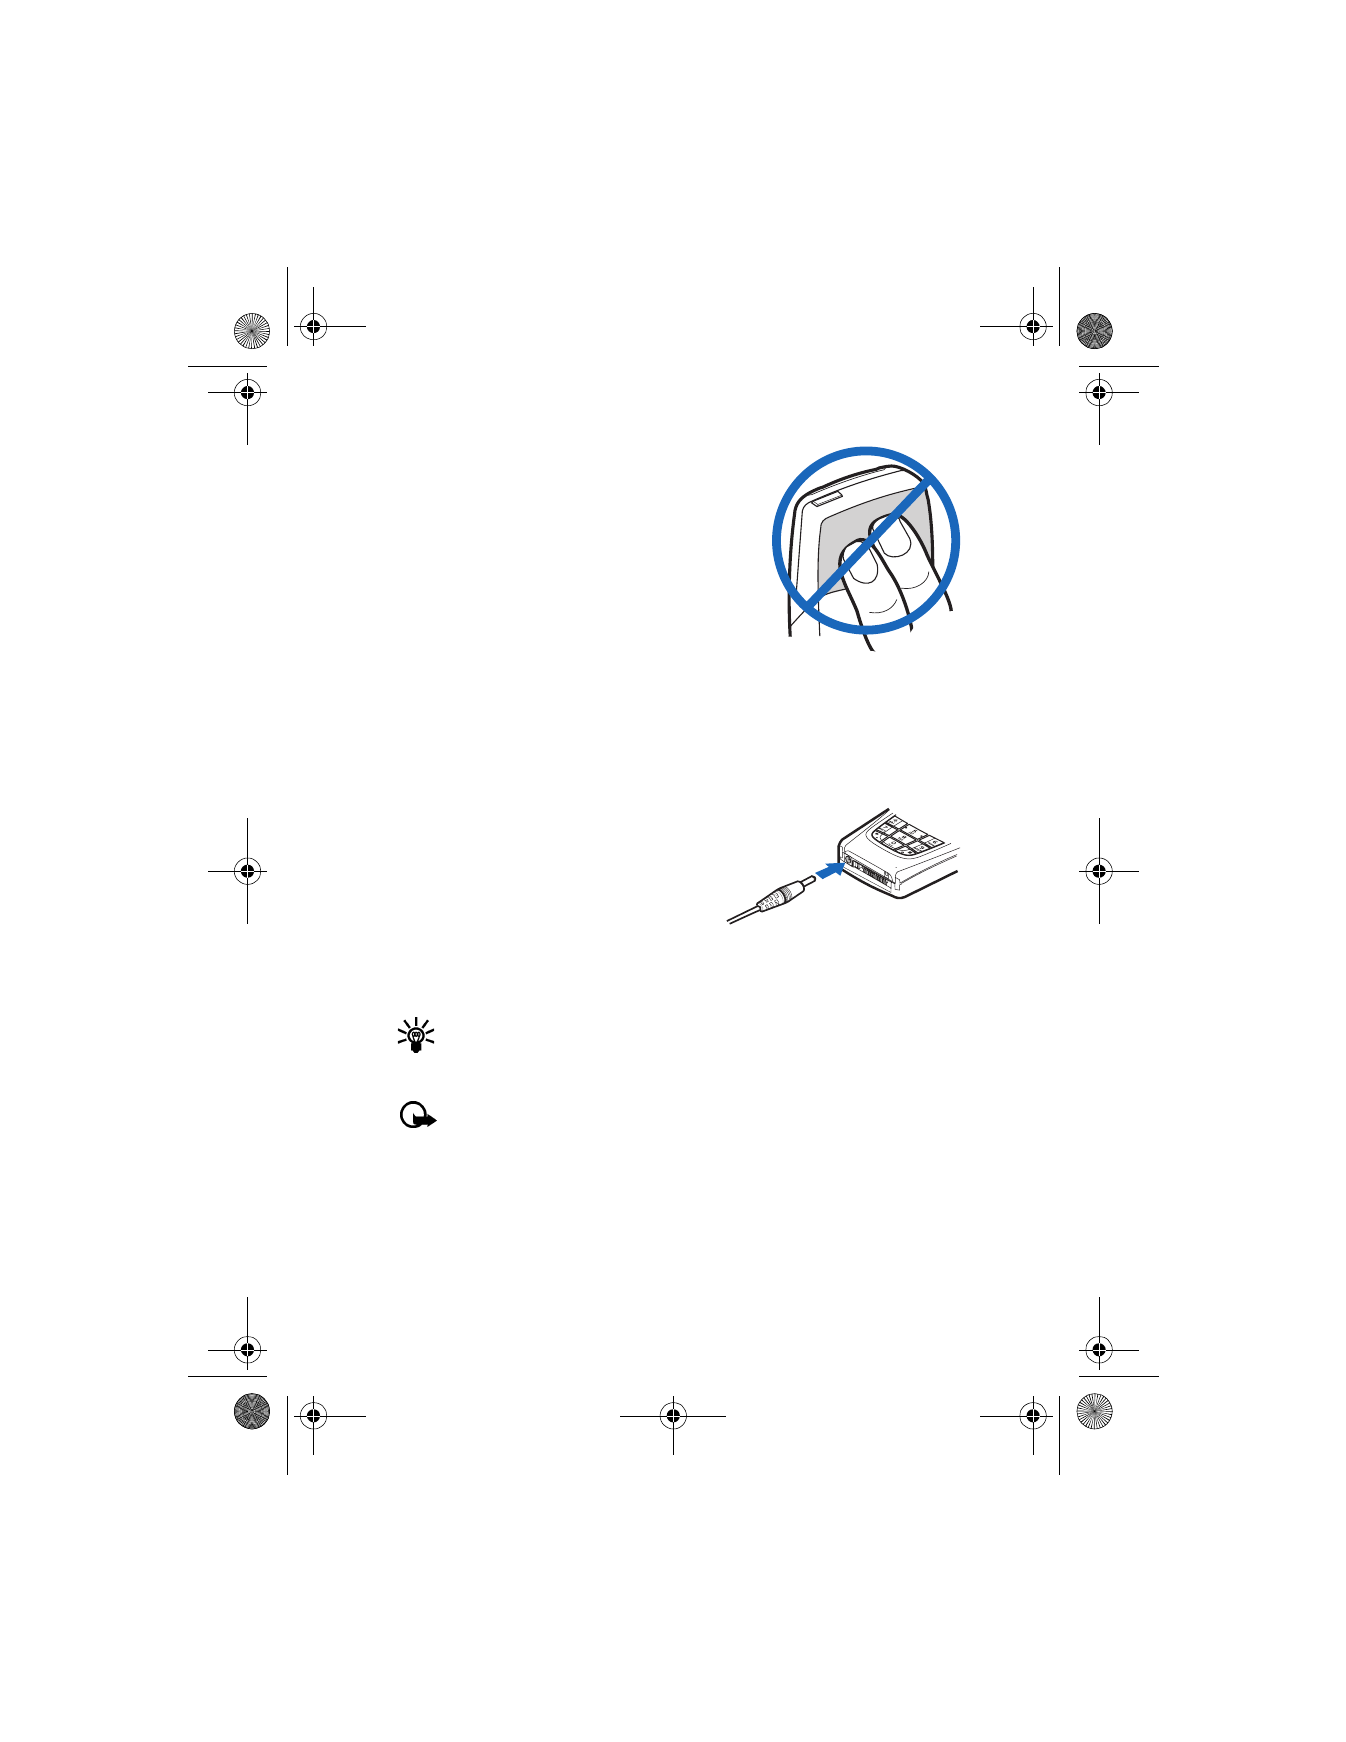
Use the antenna
Your phone has a built-in antenna. As with any
other radio transmitting device, avoid touching
the antenna unnecessarily when the phone is
switched on. Contact with the antenna affects
call quality and may cause the phone to operate
at a higher power level than otherwise needed.
Not touching the antenna area during a phone
call optimizes the antenna performance and the
talk time of your phone.
Use the battery
CHARGE THE BATTERY
1
Plug the charger into a standard ac outlet.
2
Insert the charger output plug into
the round connector at the bottom
end of the phone.
After a few seconds, the battery
indicator in the display starts to
scroll from bottom to top. If the
battery is completely empty, it may take a few minutes before the
charging indicator appears on the display or any calls can be made.
Tip: You can use the phone while the charger is connected.
IMPORTANT BATTERY INFORMATION
Important: Your phone is powered by a rechargeable battery.
Use only batteries approved by Nokia and recharge your battery
only with the chargers approved by Nokia. Never use any charger
or battery which is damaged.
The battery can be charged and discharged hundreds of times but it will
eventually wear out. When the operating time (talk-time and standby
time) is noticeably shorter than normal, it is time to buy a new battery.
6200.ENv1_9356027.book Page 8 Wednesday, July 7, 2004 3:40 PM
[ 9 ]
Welcome and quick guide
PROLONG THE BATTERY
Use the following guidelines to obtain the best performance from
your battery:
•
With your phone turned off, charge your new battery for three hours
before its first use. Use the battery until it is fully discharged. Repeat
this procedure twice for a total of three charging cycles.
•
Note that the full performance of a new battery is achieved only after
two or three complete charge and discharge cycles. Battery operation
times may be less than the estimated times during the first charges.
This condition is normal.
•
You can use your phone while the battery is charging. However, if the
battery is completely empty, it may need to recharge a few minutes
before you can make or receive calls or the battery indicator appears.
•
After the first charge, you can make and receive calls during the
charging cycle, but the calls lengthen the charging time. When the
phone call ends, the charge will resume.
•
The bars on the screen stop scrolling and remain constant when the
phone is fully charged. If you leave the phone connected to the charger,
the battery receives an additional charge. If you switch the phone on
when charging is complete, the Battery full message momentarily
appears in the display.
Note: The battery will accept a “trickle charge" for an additional
two hours.
REPLACE THE BATTERY
You will need to remove the existing battery if you want to replace the
battery or insert the SIM card. Make sure the phone has been turned off
for 10 seconds before removing the battery.
Note: Before removing the phone cover, always switch off the
power and disconnect the phone from the charger or any other
device. Always store and use the phone with the covers attached.
6200.ENv1_9356027.book Page 9 Wednesday, July 7, 2004 3:40 PM
[ 10 ]
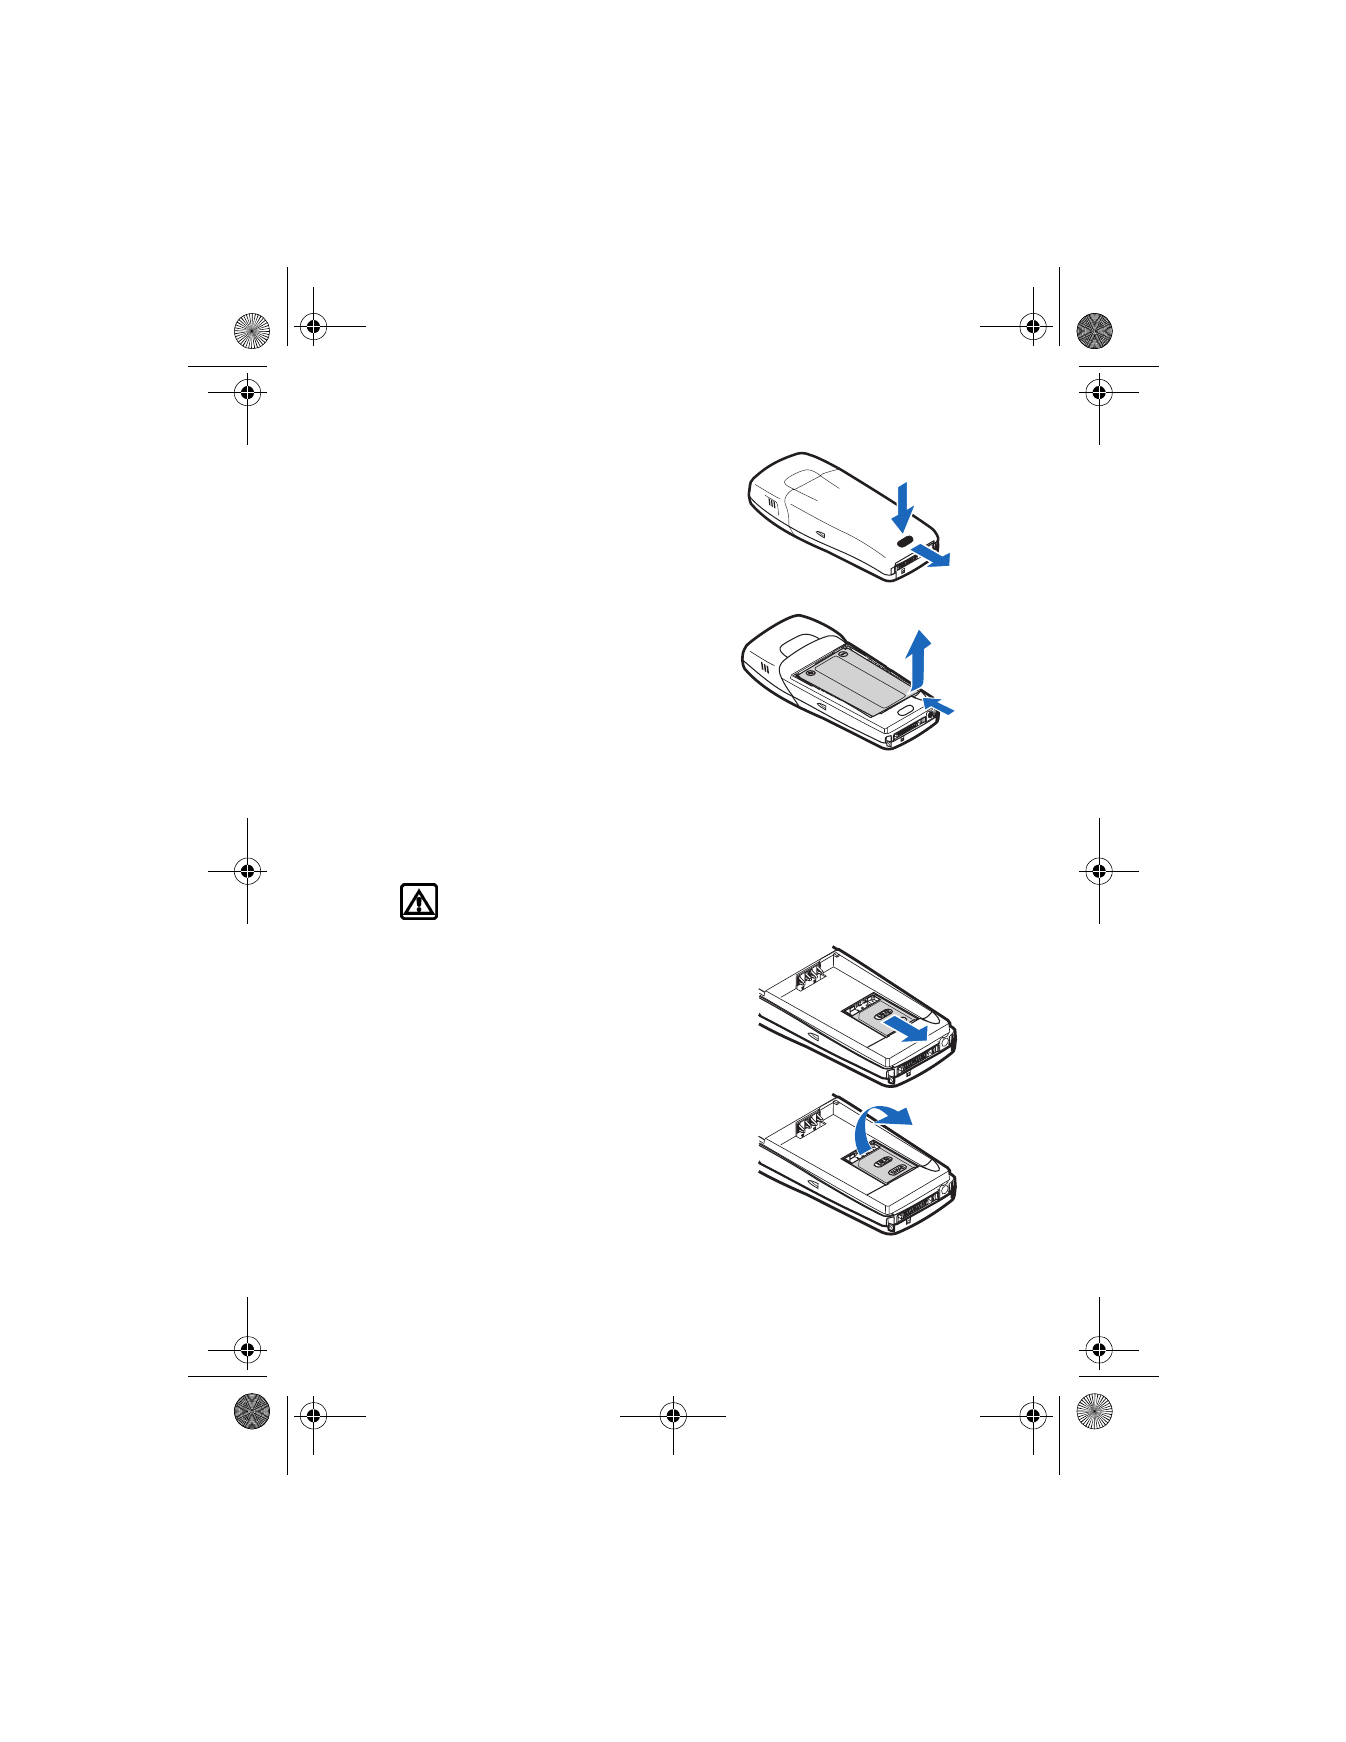
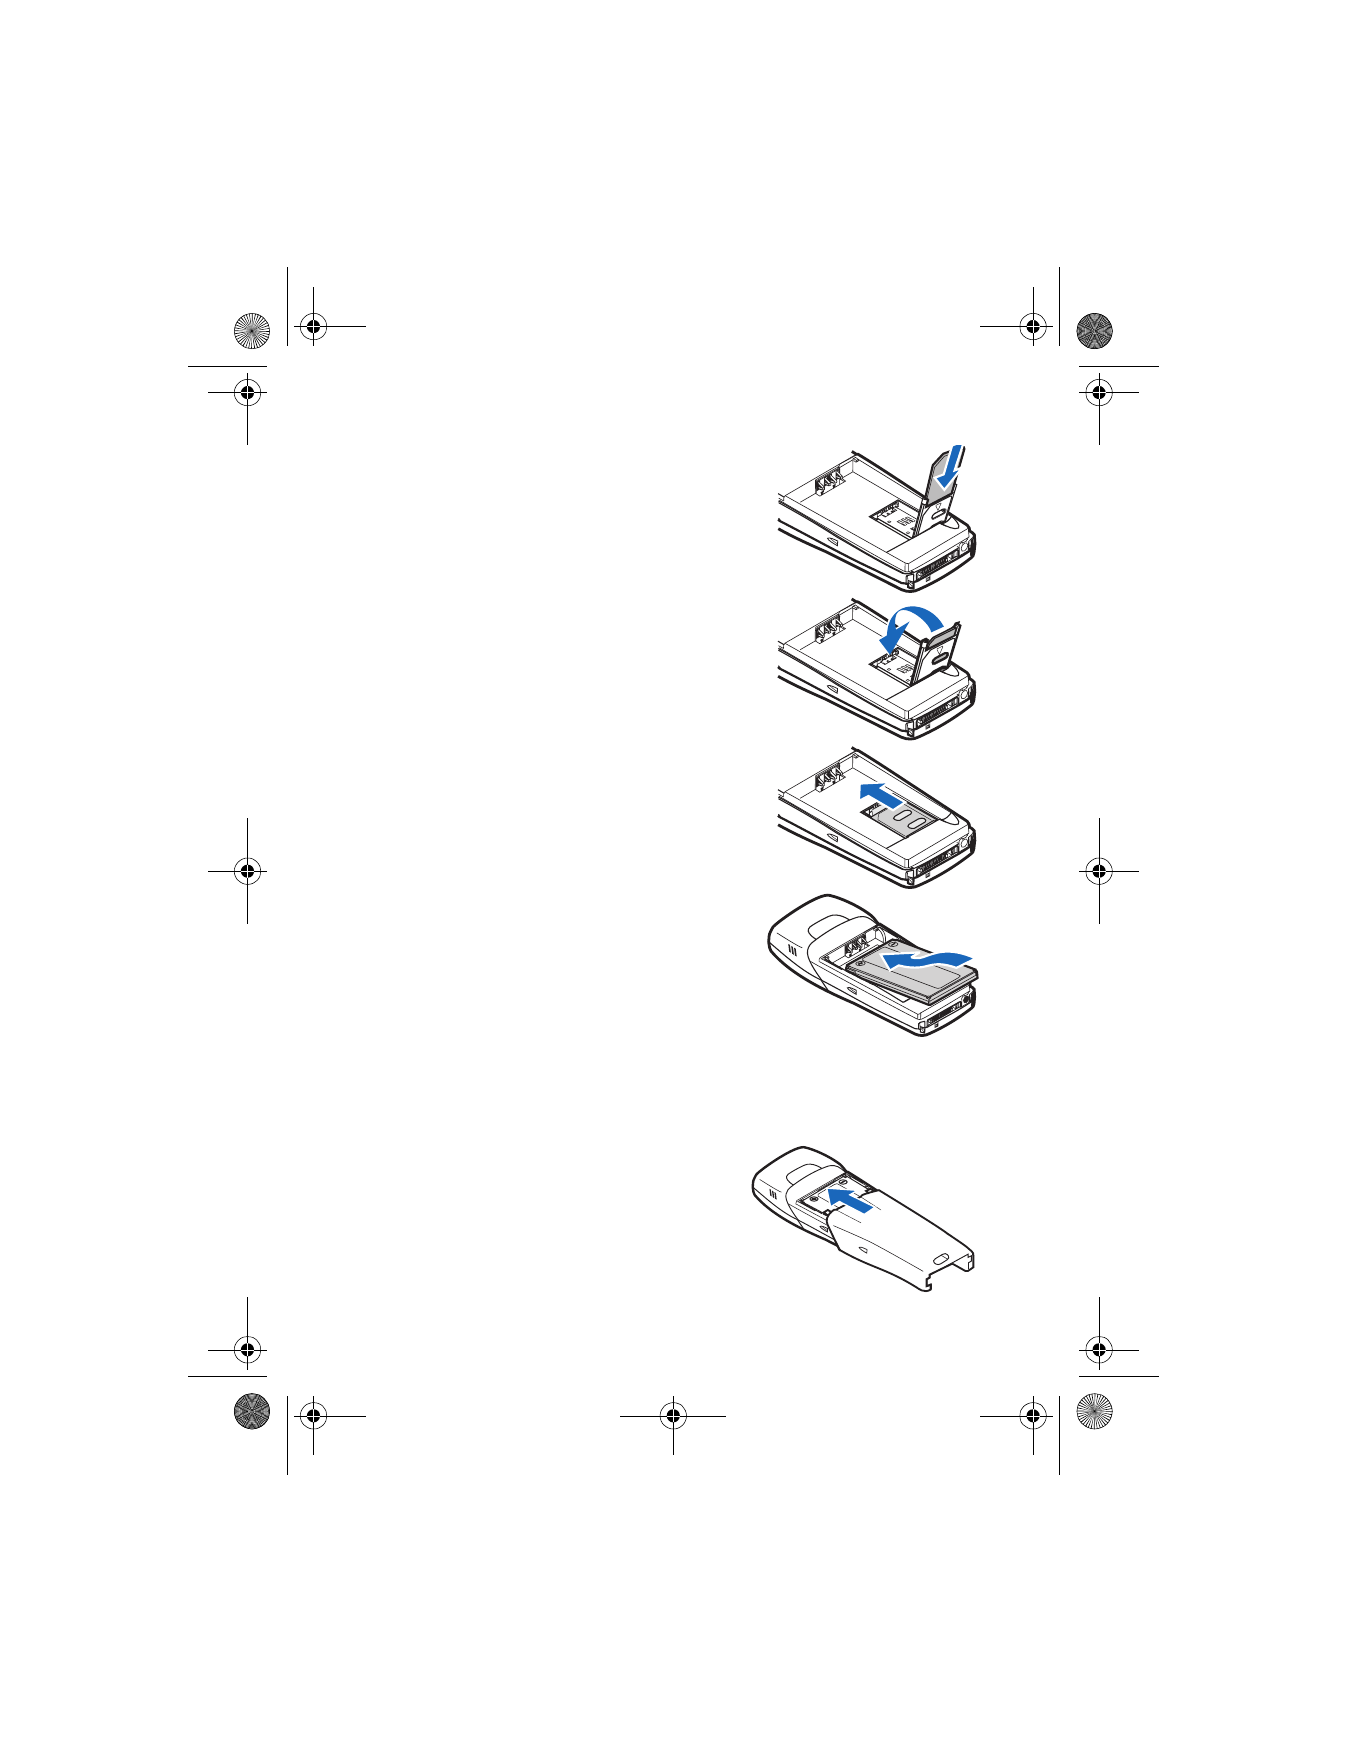
REMOVE THE BACK COVER
1
With the back of the phone facing
you, push down on the back cover
release button.
2
Slide the back cover toward the
bottom of the phone and remove.
REMOVE THE BATTERY
3
After you have removed the back
cover, insert your finger into the
finger grip and lift the battery
from its compartment.
Install the SIM card
The SIM card and its contacts can easily be damaged by scratches or
bending, so be careful when handling, inserting, or removing the card.
Before installing the SIM card, always make sure that the phone is
switched off and that you have removed the cover and battery.
Warning: Keep all SIM cards out of reach of small children.
1
Slide the SIM card holder toward
the bottom end of the phone until
it unlocks.
2
Swing the SIM card holder open.
1
2
3
1
2
6200.ENv1_9356027.book Page 10 Wednesday, July 7, 2004 3:40 PM
[ 11 ]
Welcome and quick guide
3
Insert the SIM card into the holder
(beveled corner last) with the gold
contacts facing toward the top end
of the phone.
4
Close the SIM card holder.
5
Slide the SIM card holder toward
the top end of the phone until it
locks into place.
INSTALL THE BATTERY
The SIM card must be installed before
installing the battery.
1
Position the battery so the gold
contacts match up with those on
the phone. The battery label should
be facing away
from the phone.
2
Insert the battery, contact end first
into the battery slot.
3
Snap the other end of the battery into place.
REPLACE THE BACK COVER
4
Slide the back cover toward the
top of the phone until you hear a
click and see the back cover
release button.
3
4
5
6200.ENv1_9356027.book Page 11 Wednesday, July 7, 2004 3:40 PM
[ 12 ]
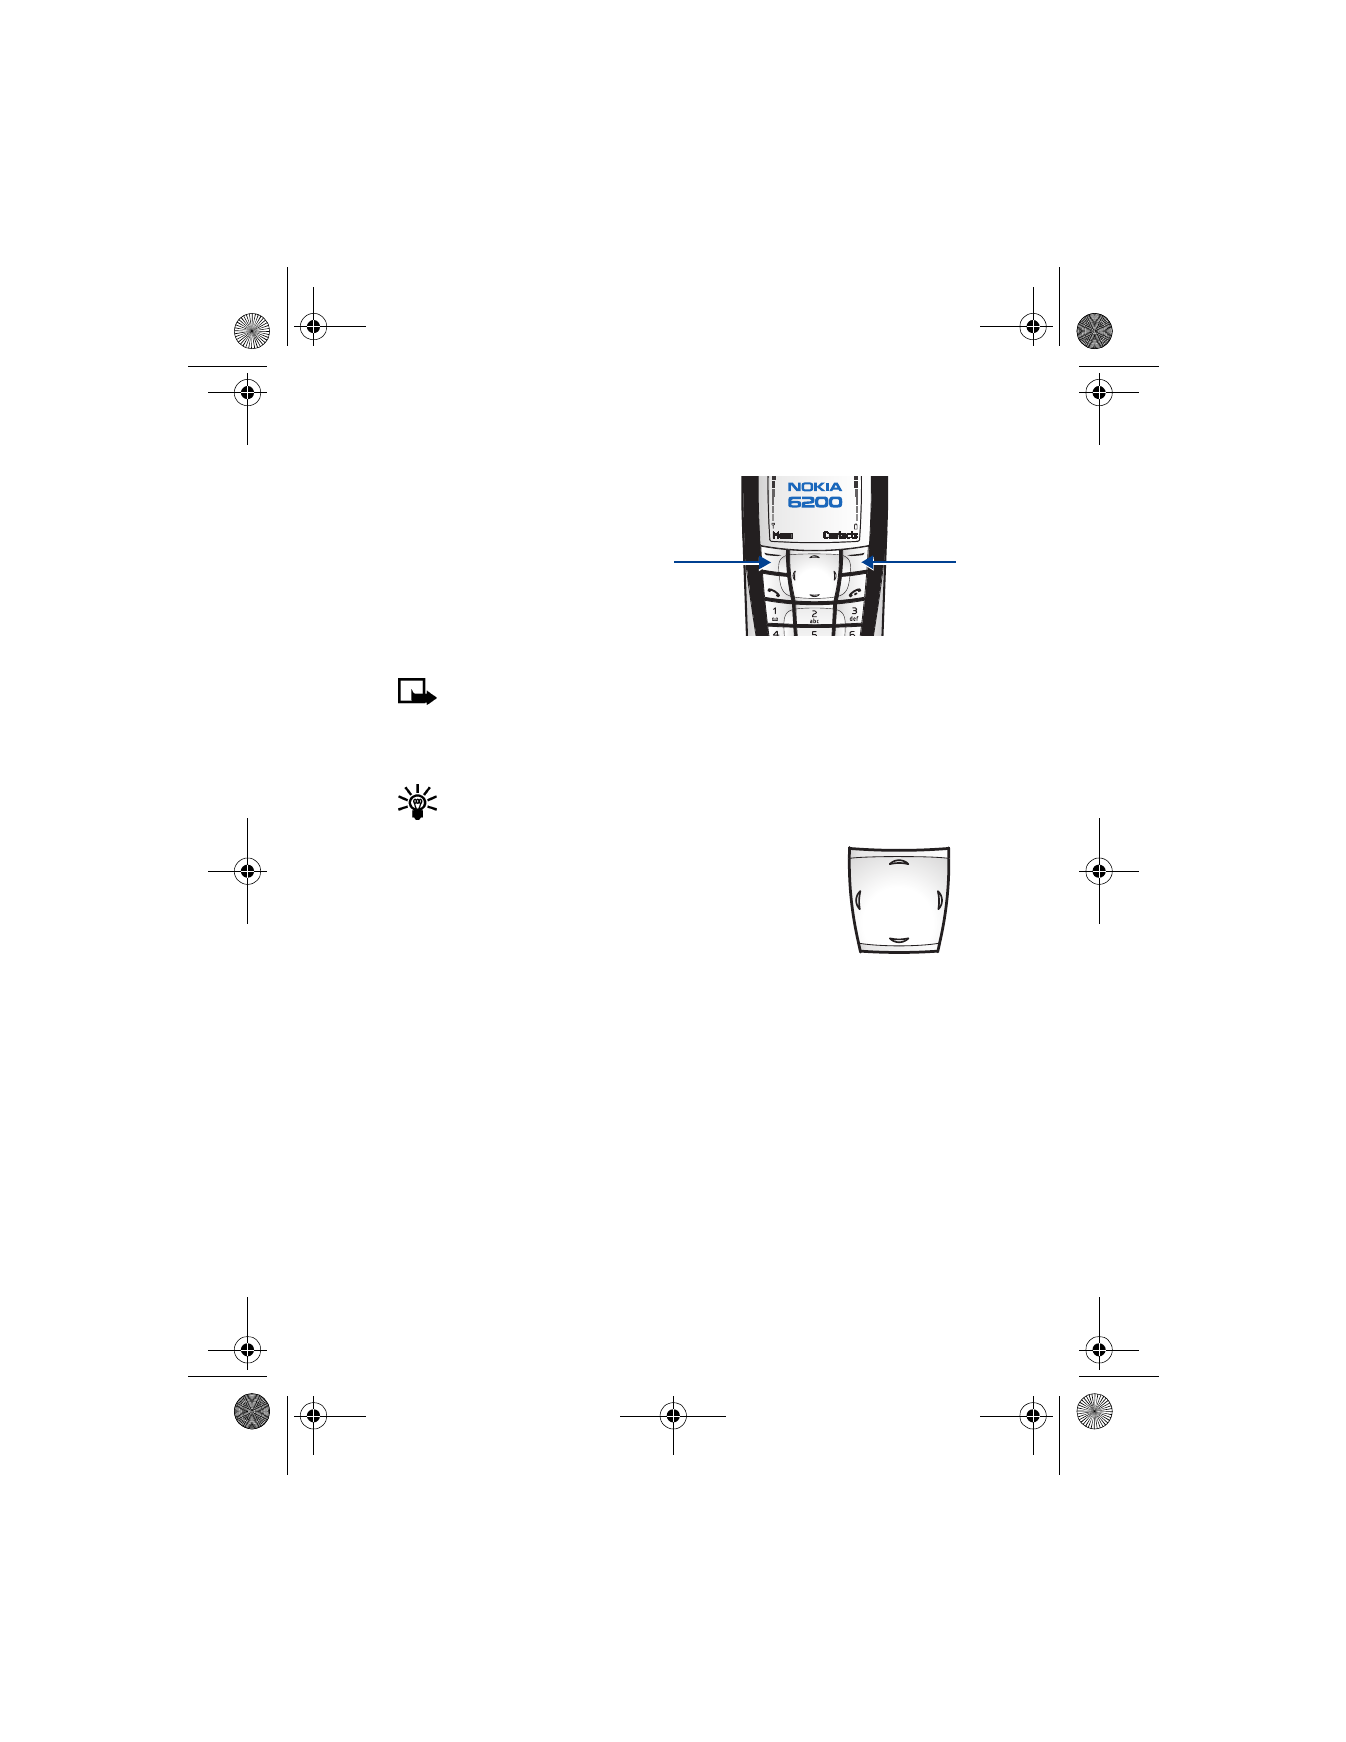
Use the selection and scroll keys
Below each corner of the display
are the selection keys. Press
b
when Menu appears above it to
show the first of numerous menus.
Page through the rest of the
menus using the up and down
scroll keys (
d
or
g
). Press
c
when Contacts appears above it to enter the contacts list.
Note: The function of the right selection key (
c
) can be modified
so that your most frequently used functions can be quickly
accessed from the Start screen. See “Right selection key settings”
on page 85 for details.
Tip: Press an up or down scroll key (
d
or
g
) from the Start
screen to view any entries in your contacts list.
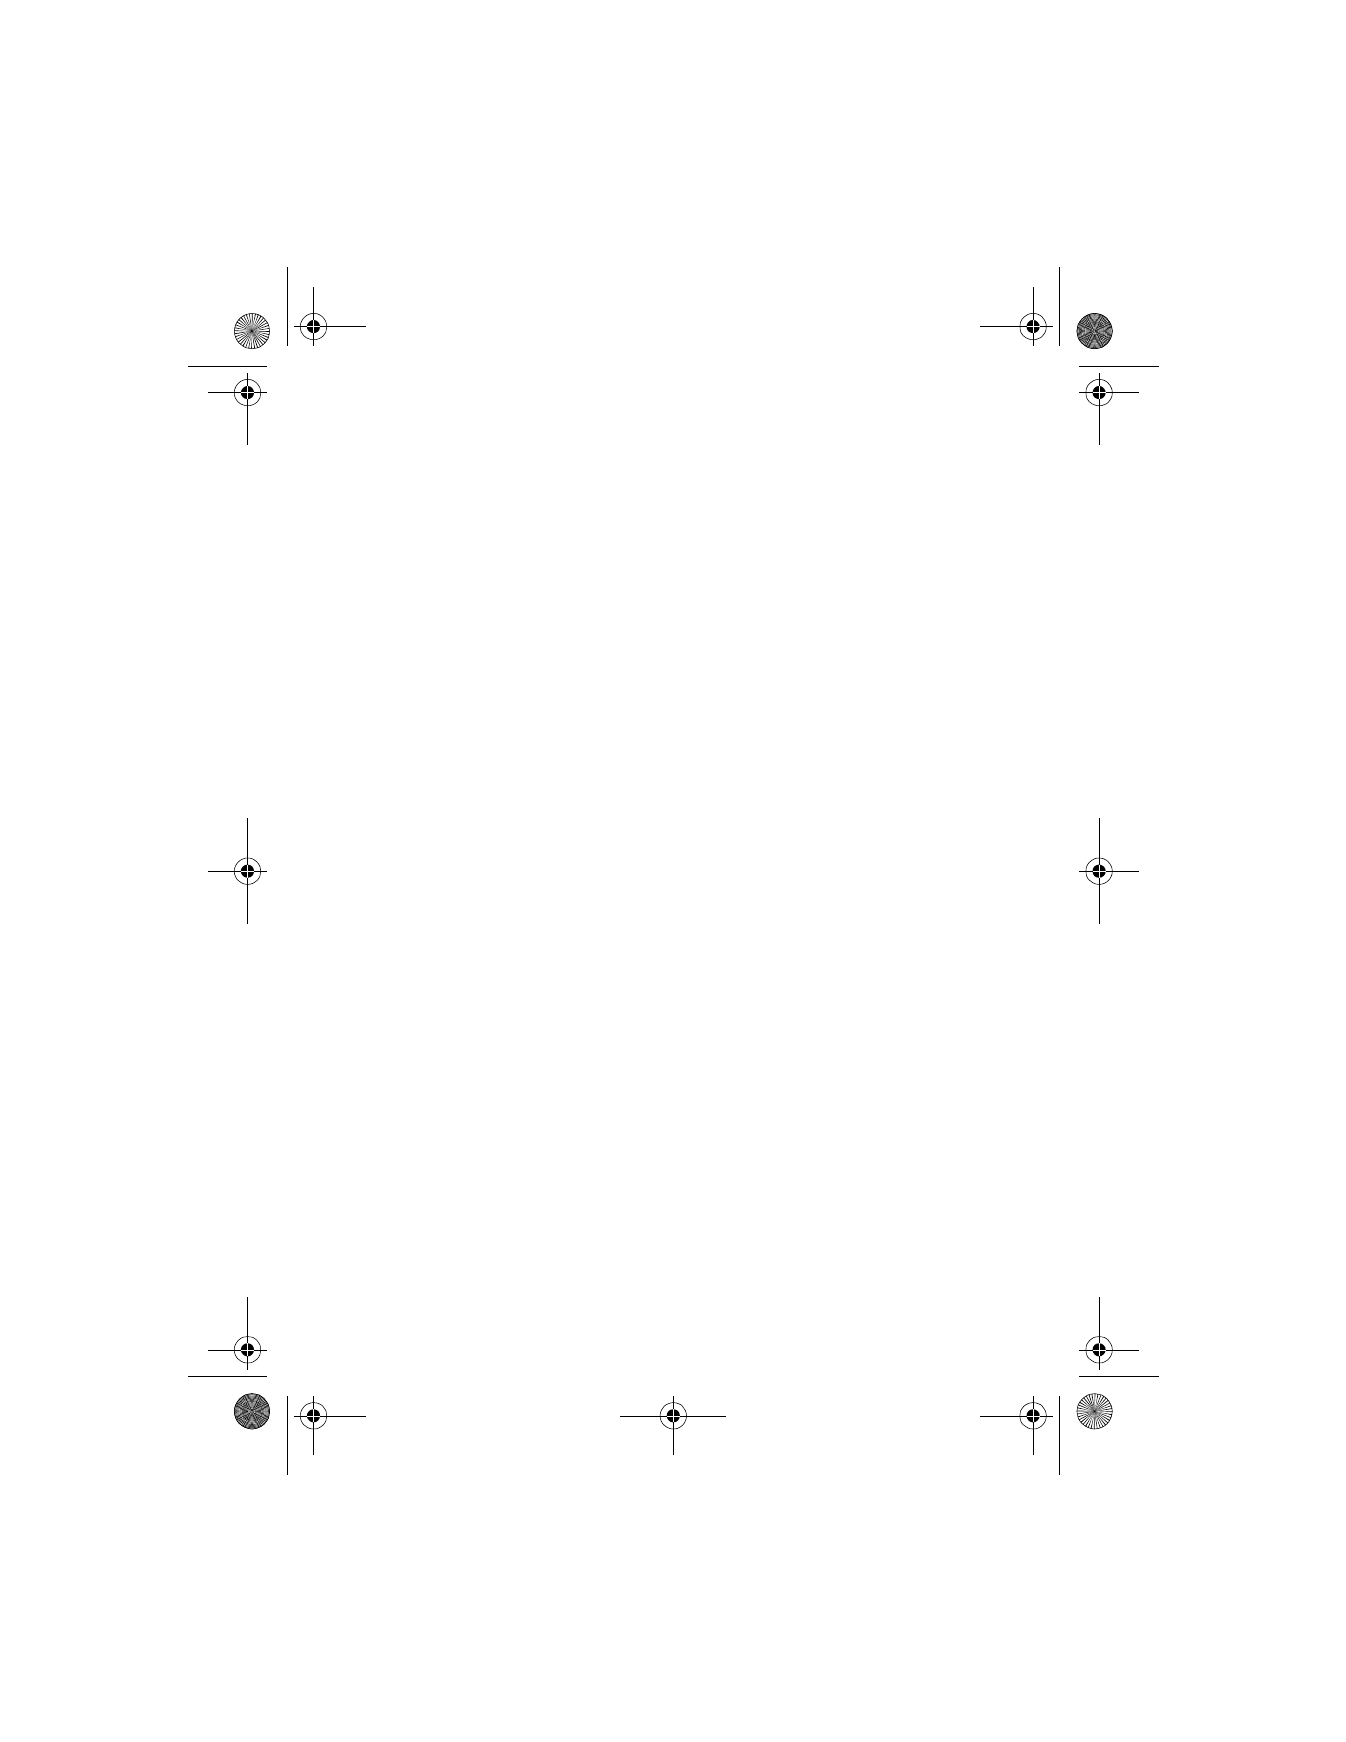
Use four-way scrolling
In features, such as the calendar monthly view, text
messages, and special characters, you can move the
cursor up and down as well as left and right. To move the
cursor:
Shared memory
The following features in this phone may share memory: contacts, text
and multimedia messages, images and ringing tones in gallery, calendar
and to-do notes, Java games and applications, and voice recorder and
commands. Using any such features may reduce the memory available for
any features sharing memory. This is especially true with heavy use of any
of the features (although some of these features may have a certain
amount of memory specially allotted to them in addition to the amount
of memory shared with other features).
Left, press
f
Up, press
d
Down, press
g
Right, press
e
Right
select
Left
select
6200.ENv1_9356027.book Page 12 Wednesday, July 7, 2004 3:40 PM

[ 13 ]
Welcome and quick guide
For example, saving many images, bookmarks, Java applications, or other
features sharing memory may take all of the shared memory and your
phone may display a message that the memory is full. In this case, delete
some of the information or entries stored in the shared memory features
before continuing.
The following functions use shared memory that is dependent on the
data quantity per item and shared memory available at a time in the
Nokia 6200 phone:
•
Contacts
•
Short messaging service (SMS) messages
•
Calendar notes
•
To-do list
•
Voice tags for commands
•
Voice tags for contacts
•
Multimedia messages (MMS)
•
MIDI ringing tones
•
Images
•
Java applications
6200.ENv1_9356027.book Page 13 Wednesday, July 7, 2004 3:40 PM
[ 14 ]